Shows whether the oil is still OK. Compare the coloration of the oil.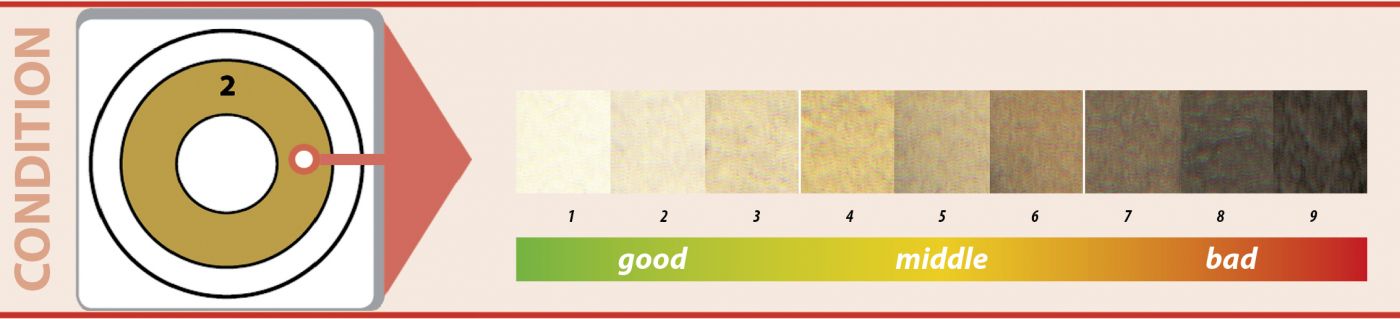


Remove the cover sheet at the marked location.
Tip: Ensure the test field remains clean and dry.

Extract the dipstick or obtain oil from the cap of the motor oil filling opening. Ensure the engine is at operating temperature..
Tip: Unlike measuring oil levels, you only need to extract the dipstick once.

Place only one drop on the test field.
Tip: Drops fall best when the stick is not touching the test field. Depending on the motor and oil condition, development time typically ranges from 1.5 to 8 hours. For optimal results, leave the test overnight to ensure perfect development.
Tip: Record vehicle registration, mileage, and oil running performance carefully.

Once the drop has developed, proceed step by step, evaluating from the inside to the outside.
Use the enclosed evaluation scale to assess the completed result. Compare colours and mark accordingly.
Tip: Utilise a magnifying glass for easier identification of small particles, such as exhaust residue.
Shows whether the oil has been contaminated by small particles – for example, exhaust particles, grime, dust, abrasions or other substances.
Shows whether the oil is still OK. Compare the coloration of the oil.
Benzin condition
Water in the oil forms defined peaks in the outer areas, whereas coolant forms a yellow ring around the jagged circle.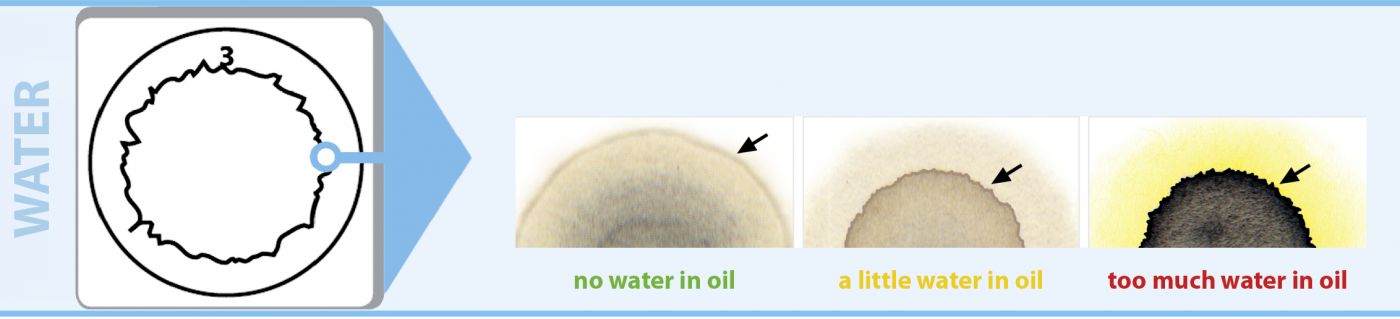
Hold the test paper facing towards the light. The larger the transparent ring around the outside, the more fuel there is in the oil.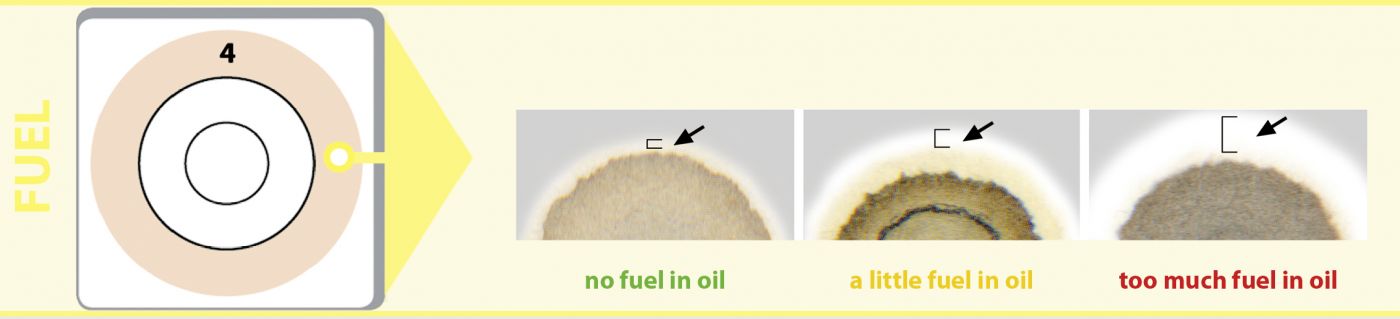
shows whether the oil has been contaminated by small particles – for example, exhaust particles, grime, dust, abrasions or other substances.
Shows whether the oil is still OK. Compare the coloration of the oil.
Water in the oil forms defined peaks in the outer areas, whereas coolant forms a yellow ring around the jagged circle.
Hold the test paper facing towards the light. The larger the transparent ring around the outside, the more fuel there is in the oil.
